


Coating motorcycle parts can transform the look of a bike while adding protection against the elements. However, several common mistakes can compromise the finish, durability, and overall appearance of the final result. Understanding these errors and knowing how to avoid them makes the difference between a professional-looking coating and one that chips, fades, or fails prematurely.
Mistake #1: Skipping Proper Surface Preparation
The most critical error occurs before any coating material ever touches the part. Surface preparation determines how well the coating adheres and how smooth the final finish appears.
Any imperfection on the surface: dirt, grease, old paint, or rust: will transfer directly to the finished coating. Many people underestimate how thoroughly parts need to be cleaned and prepared. Simply wiping down a part with a rag is not sufficient preparation.
The Fix: Properly preparing motorcycle parts involves several steps. First, all existing coatings, rust, and corrosion must be completely removed. Chemical stripping or media blasting effectively removes old finishes. Next, parts should be cleaned with a degreaser to eliminate oils and contaminants. Finally, parts need to be wiped down with a solvent cleaner right before coating to remove any residual oils from handling.
The surface beneath the coating determines the quality of the final appearance. Taking time to properly prepare each part ensures a smooth, professional finish that lasts.

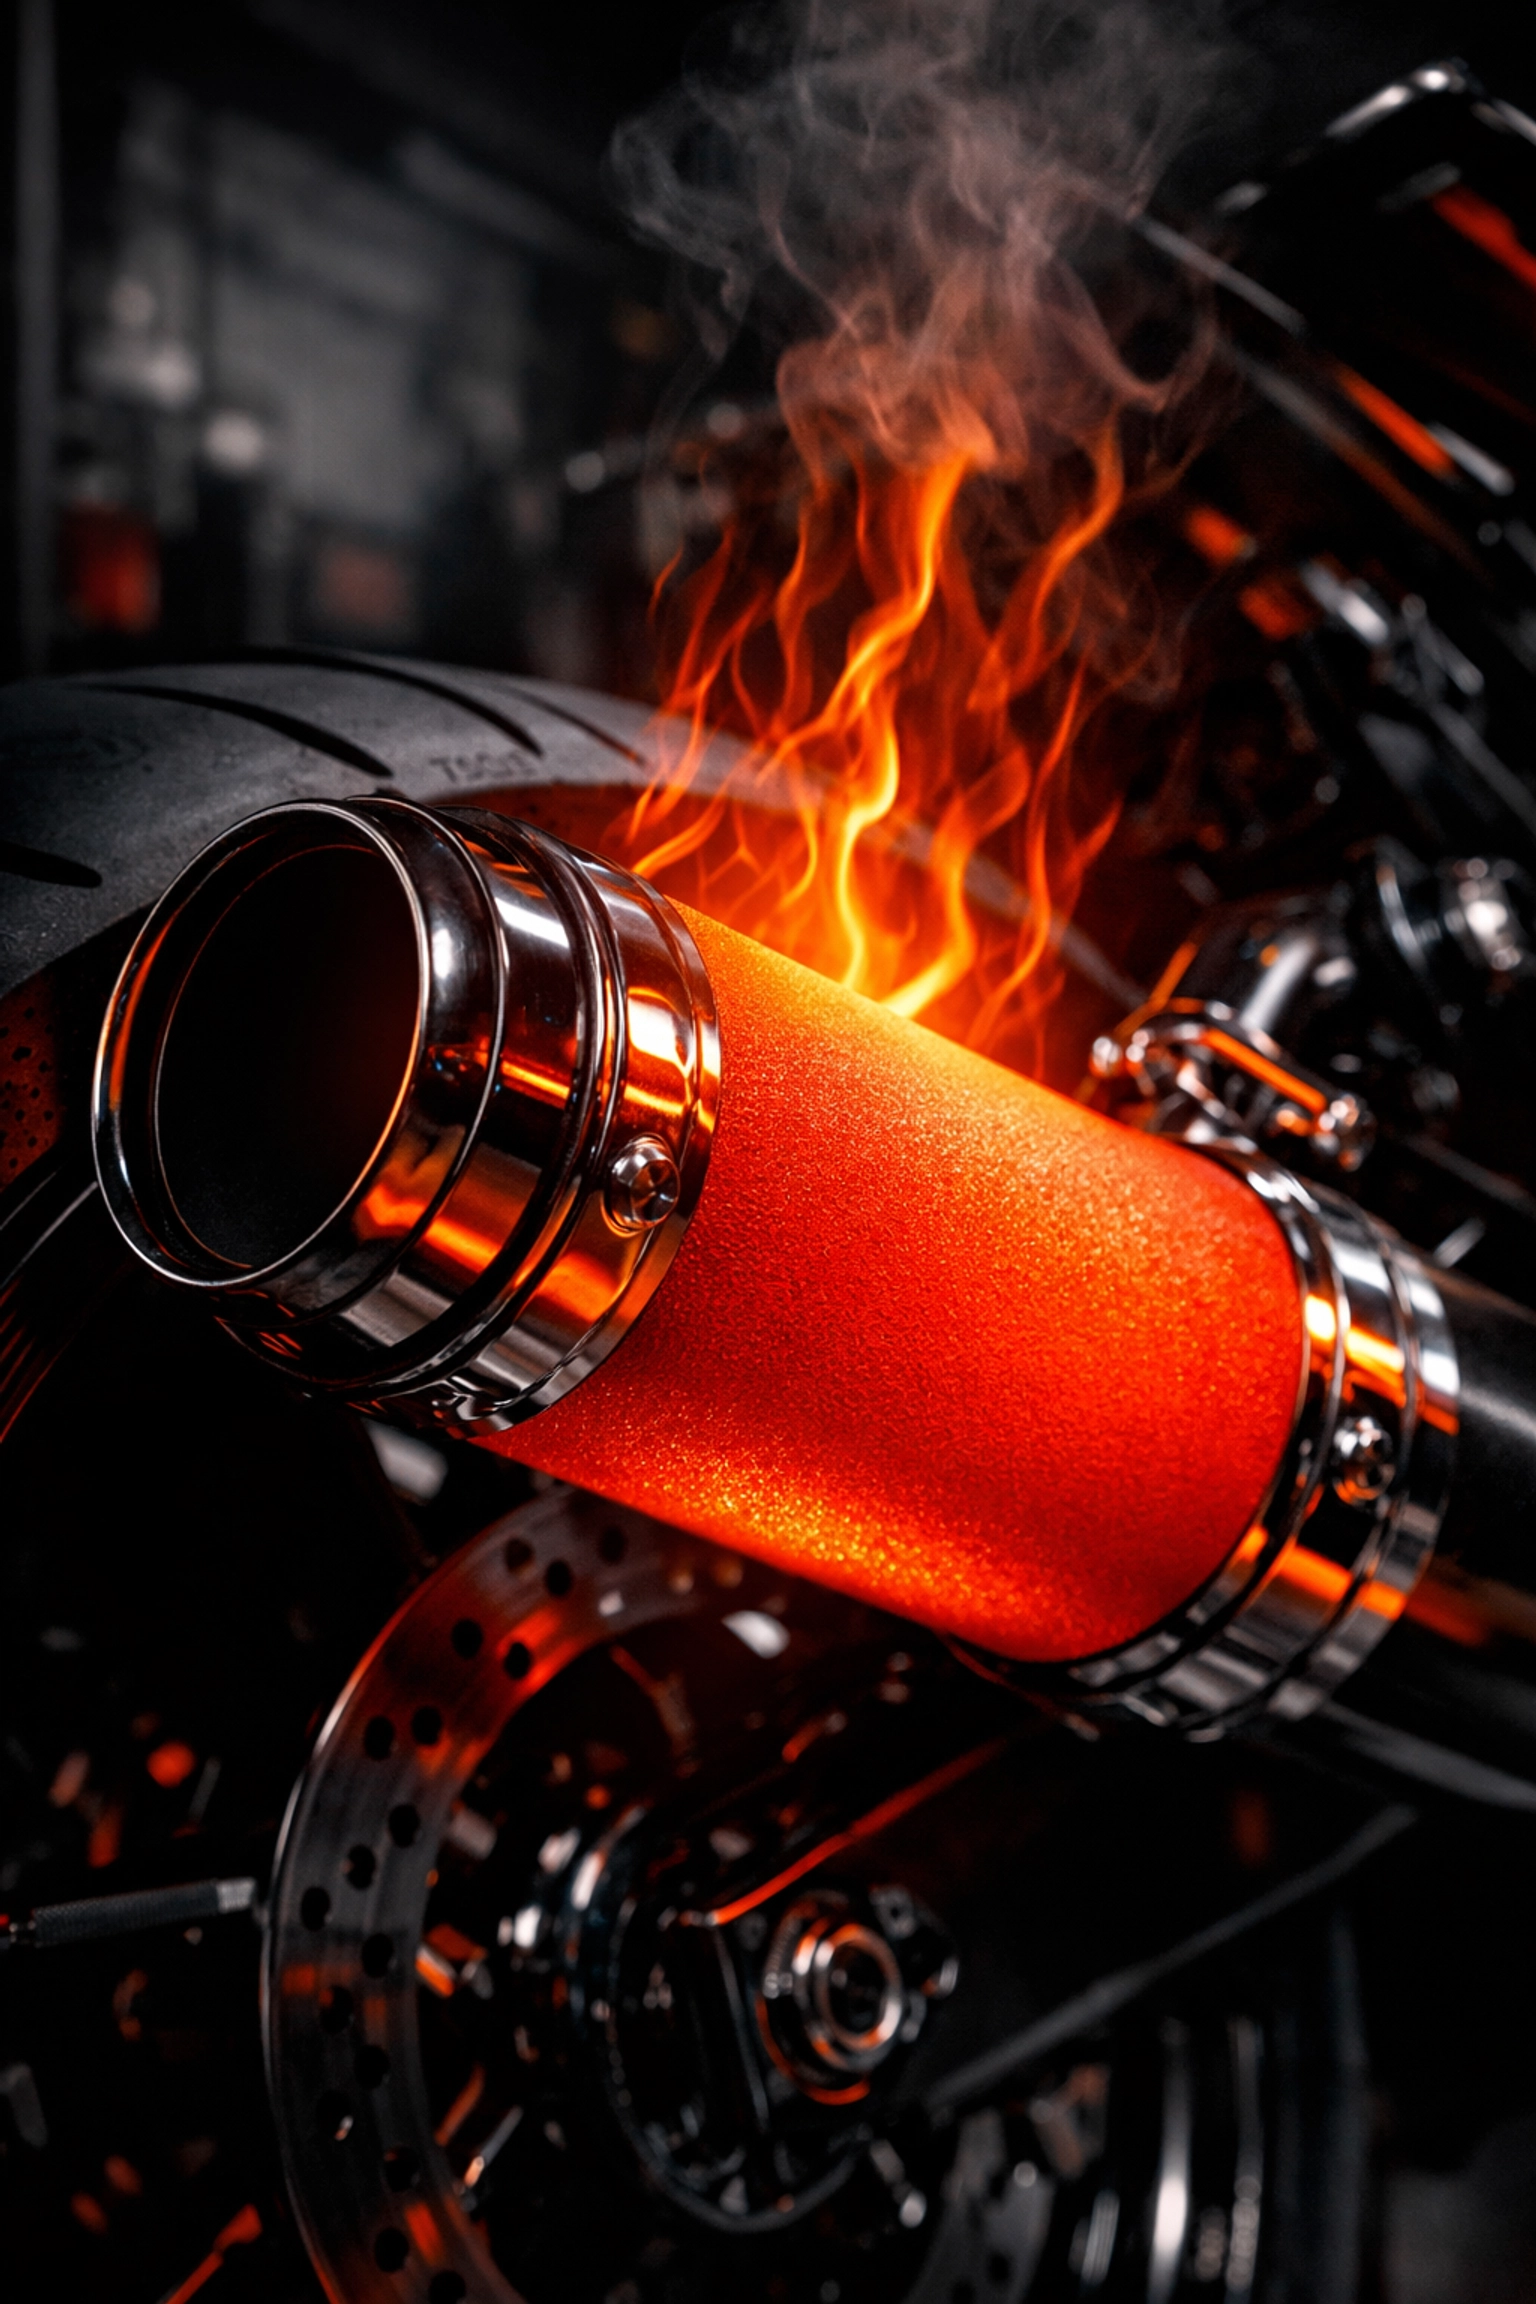
Mistake #2: Choosing the Wrong Coating for High-Heat Parts
Not all coatings can withstand the extreme temperatures generated by certain motorcycle components. This mistake commonly occurs with exhaust systems, which can reach temperatures exceeding 1,200 degrees Fahrenheit during operation.
Standard powder coating breaks down and discolors when exposed to high heat. Many people don't realize this limitation until their freshly coated exhaust pipes start changing color or the coating begins to fail after a few rides.
The Fix: High-heat components require specialized ceramic coatings designed specifically for extreme temperatures. These ceramic exhaust coatings maintain their appearance and protective qualities even under intense heat cycling.
For other motorcycle parts that don't experience extreme heat: frames, swing arms, wheels, triple trees: standard powder coating provides excellent durability and a wide range of color options. Matching the coating type to the operating temperature of each component ensures long-lasting results.
Mistake #3: Ignoring Environmental Conditions During Application
Temperature and humidity levels during coating application significantly impact the final result. Applying coatings in uncontrolled environments leads to various defects including poor adhesion, uneven texture, and premature failure.
Excessive heat causes coatings to dry too quickly, preventing proper flow and leveling. High humidity introduces moisture into the coating, creating bubbles, blistering, or a hazy appearance. Cold temperatures prevent proper curing and can cause the coating to remain soft or tacky.
The Fix: Professional coating facilities maintain controlled environments with regulated temperature and humidity levels. Parts should be allowed to reach room temperature before coating begins. For those attempting coating work themselves, choosing moderate weather conditions and avoiding direct sunlight helps achieve better results.
Additionally, freshly coated parts need to cure in a controlled environment. Rushing the curing process or exposing parts to temperature extremes during cure time compromises the coating's hardness and durability.
Mistake #4: Applying Coating Too Thick in One Pass
The temptation to achieve full coverage quickly leads many people to apply coating material too heavily. This approach creates multiple problems including runs, sags, orange peel texture, and uneven curing.
Thick coatings take longer to cure properly and may remain soft beneath a hardened outer surface. The excessive thickness also makes the coating more prone to chipping and cracking, especially around edges and corners.
The Fix: Building coverage gradually with multiple thin coats produces superior results. The first coat establishes initial coverage and allows assessment of how the coating interacts with the surface. Subsequent coats build color depth and uniform coverage without the defects associated with heavy application.
Each coat needs adequate flash time: the period allowing solvents to evaporate before the next coat is applied. Rushing between coats traps solvents, which can later cause coating failure. Patience during the coating process results in a harder, more durable finish that maintains its appearance longer.
Mistake #5: Overlooking Durability Requirements for Different Parts
Motorcycle parts experience varying levels of wear and exposure. Parts mounted near the road endure constant bombardment from rocks, debris, and road chemicals. Other components face primarily UV exposure and weather.
Treating all parts the same ignores these different durability requirements. A finish that works well for a gas tank may not hold up on lower frame members or foot pegs that take direct abuse.
The Fix: Understanding how each part will be used helps determine the appropriate coating system. High-wear areas benefit from additional preparation steps and coating layers that maximize impact resistance. Parts with primarily aesthetic functions may not require the same level of protection.
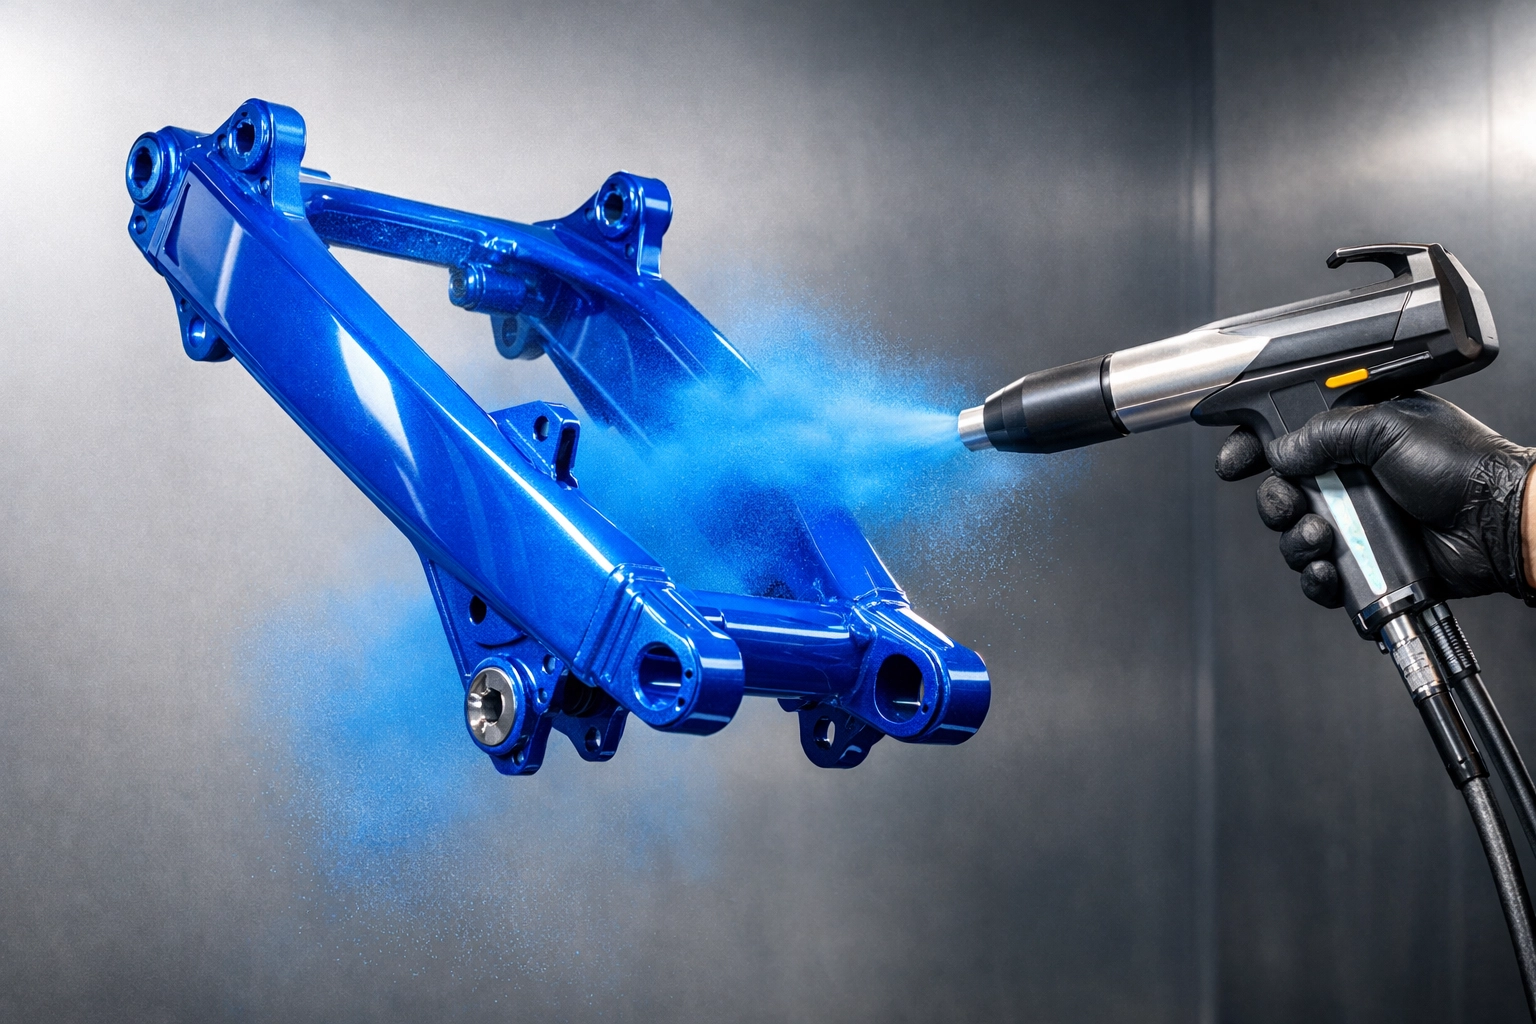
For maximum durability, powder coating outperforms traditional paint in most applications. The electrostatically applied powder creates a thicker, more uniform coating that resists chipping, scratching, and UV degradation better than liquid paint. This makes powder coating particularly suitable for motorcycle parts that need to withstand harsh conditions.
Mistake #6: Neglecting to Mask or Plug Threaded Holes and Mounting Points
Coating material that enters threaded holes, bearing surfaces, or mounting points creates serious problems during reassembly. Hardened coating in threads makes bolts difficult or impossible to install. Coating on machined mating surfaces prevents proper fit and alignment.
Many people don't realize how easily coating material migrates into small openings during application. Even small amounts of coating in critical areas cause frustration during reassembly and may require extensive cleanup or rework.
The Fix: Proper masking protects all threads, holes, and machined surfaces before coating begins. High-temperature tape, silicone plugs, and threaded caps prevent coating material from entering these critical areas. The extra time spent masking prevents much greater time spent cleaning threads or refitting parts later.
Professional coating facilities have extensive experience identifying which areas need protection. This expertise ensures parts return ready for reassembly without time-consuming cleanup or fitting issues.
Mistake #7: Not Planning for Complete Disassembly
Attempting to coat assembled components or parts with bearings, bushings, and seals still installed leads to multiple problems. Coating material damages rubber and plastic components. Heat from curing destroys seals and bearings. Incomplete coverage occurs where parts overlap or connect.
The effort required for proper disassembly sometimes discourages people from doing it correctly. However, coating assembled parts inevitably creates more work in the form of damaged components, incomplete coverage, and poor results.
The Fix: Complete disassembly before coating ensures every surface receives proper coverage and protection. All bearings, seals, bushings, and rubber components should be removed. Parts should be separated into individual components that can be coated independently.
Documentation during disassembly: photos, labeled bags, notes: makes reassembly much easier. The investment in proper disassembly pays dividends in the quality and completeness of the coating coverage. Parts can be reassembled with new bearings and seals after coating, often improving performance over the original configuration.

Getting Professional Results
Since 2010, Powder Coat It has been helping motorcycle enthusiasts in the Santa Cruz area achieve professional coating results. Understanding these common mistakes and how to avoid them helps protect the investment in custom coatings.
Whether the project involves a complete motorcycle restoration or refreshing specific components, proper coating techniques make the difference between amateur results and a professional appearance. Taking time to properly prepare parts, choosing appropriate coating materials, and following correct application procedures ensures coatings that look great and last for years.
For those who want to learn more about what powder coating is and how it compares to other finishing options, additional resources provide detailed information about the coating process and its benefits for motorcycle parts.

Powder Coat It
Santa Cruz, California
Phone: (831) 435-9558
Email: powdercoatitsantacruz@nullgmail.com
Website: www.powdercoatitsc.com
Serving the Santa Cruz area since 2010 with professional powder coating and ceramic coating services.
Recent Comments